
How to Use CapCut to Edit TikTok Reels and YouTube Videos? (Step-by-Step Guide for Beginners in 2026)
Introduction to CapCut Video Editing for TikTok, Reels, and YouTube
Honestly? The first time I opened CapCut, I had no idea what I was doing. I had filmed a 3-minute clip on my phone, wanted to turn it into a 30-second TikTok, and spent almost an hour just trying to figure out how to trim it. Sound familiar?
That was two years ago. Now I use CapCut almost every single day for TikTok Reels, YouTube Shorts, and even longer YouTube videos. And I can tell you from personal experience: once you understand how this app works, it genuinely changes the way you create content.
So in this guide, I am going to walk you through exactly how to use CapCut to edit TikTok Reels and YouTube videos from importing your very first clip to exporting a polished, professional-looking video. No fluff, no jargon. Just the real workflow I use.
What Is CapCut? and Why Creators Prefer It?
CapCut is a free video editing app developed by ByteDance the same company behind TikTok. It is available on Android, iOS, and even as a capcut for pc and Mac. What makes it special is the combination of professional-level editing tools wrapped in a beginner-friendly interface.
Most creators I know who switched from InShot or KineMaster to CapCut never went back. Why? Because CapCut gives you:
- Multi-layer timeline editing (just like desktop software)
- Built-in AI tools auto captions, background removal, AI voiceovers
- Trending effects and transitions made specifically for social media
- Direct export and sharing to TikTok, YouTube, Instagram, and more
- Completely free, with no watermark on the base version
Whether you are a student making your first video or a full-time creator managing multiple platforms, CapCut meets you where you are.
Short-Form vs Long-Form Video Editing – What’s the Difference?
This is something most beginner guides skip, but it matters a lot.
Short-form videos (TikTok, Instagram Reels, YouTube Shorts) are typically under 90 seconds. The editing style is fast, punchy, and hook-driven. Every second counts. You are cutting hard, syncing to beats, adding bold captions, and keeping energy levels high throughout.
Long-form videos (standard YouTube content, tutorials, vlogs) can run anywhere from 5 to 30+ minutes. Here, the editing is more about flow and retention. You are removing awkward silences, structuring information clearly, adding chapter-like segments, and making sure the audio is clean and balanced.
CapCut handles both but the workflow is different for each, and I’ll cover both in this guide.
Why CapCut Is Trending for TikTok, Instagram Reels, and YouTube Shorts in 2026?
In 2026, CapCut APK has grown into one of the most-downloaded creative apps globally, especially in India, Pakistan, Bangladesh, Indonesia, and the Philippines. The reason is simple most trending editing styles you see on TikTok (like velocity edits, smooth transitions, glitch effects, and auto-sync beats) were either popularized through CapCut templates or are easiest to achieve inside CapCut.
If you have ever watched a viral Reel and thought “how did they do that transition?” there is a very good chance the answer is CapCut.
CapCut Editing Interface Explained (Beginner-Friendly Overview)
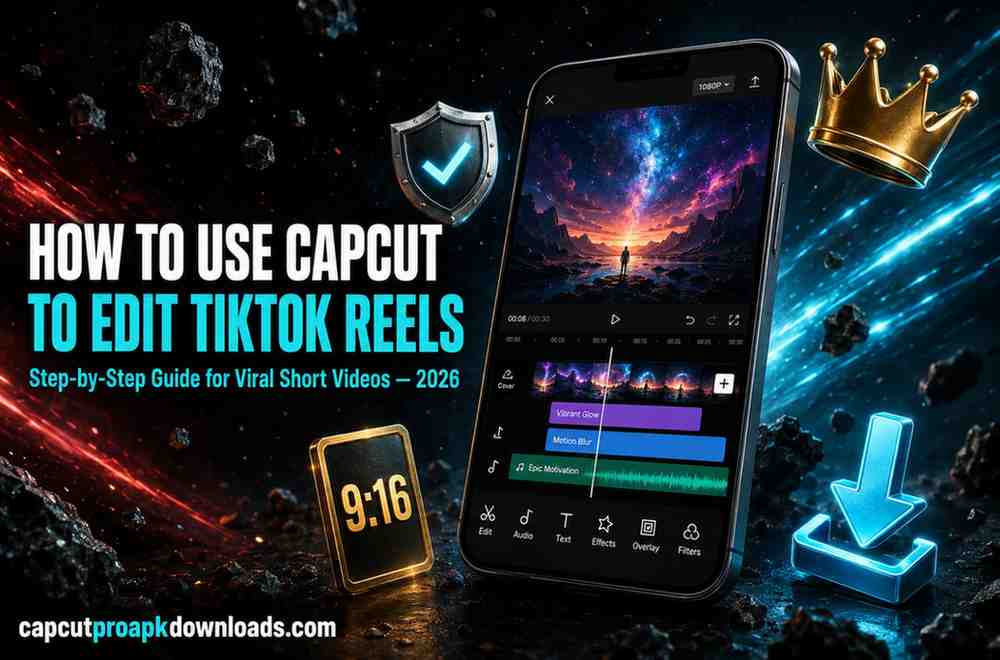
Before touching a single clip, you need to understand the three main zones of CapCut’s editing screen. I spent my first week confused because I kept tapping the wrong area. Once this clicked, everything else became easy.
Preview Window and Real-Time Playback
At the top of your screen sits the preview window. This is where you see exactly what your video looks like at any given point in the timeline. The play button (▶) in the center lets you preview your edit in real time.
One tip I always give beginners: play your video from the preview window every few minutes while editing. Do not wait until you are done to check how it looks. Real-time preview saves you from making a big mistake and only realizing it at the end.
Editing Timeline and Layer System
Right below the preview is the editing timeline the heart of CapCut. This is where your video clips, audio tracks, text layers, effects, and stickers all live as separate horizontal strips.
Think of it like a sandwich. Your main video clip is the bread at the bottom. On top of that, you can stack audio layers, then text layers, then effects and stickers. Each layer can be moved, stretched, trimmed, or deleted independently.
This multi-layer system is what separates CapCut from simpler apps. It gives you real control over exactly what appears on screen and when.
Toolbar and Essential Editing Tools
At the very bottom of the screen is the toolbar. This changes dynamically depending on what you have selected. When nothing is selected, you see the main tools: Audio, Text, Effects, Filters, Stickers, Transitions, and more. When you tap on a clip in the timeline, the toolbar shifts to show clip-specific tools like Trim, Split, Speed, and Filters.
Pro tip: If you cannot find a tool, chances are you just need to tap on the right element in the timeline first, and the toolbar will update automatically.
Media Library and Asset Management
CapCut has a built-in media library called the “Materials” section. Inside, you will find:
- Sounds: trending audio tracks, categorized by mood and genre
- Effects: visual effects like glitch, VHS, neon glow, etc.
- Transitions: smooth, glitch, fade, and hundreds of other transition styles
- Stickers: animated and static overlays
- Templates: pre-made edits where you just swap in your own footage
Bookmarking your favorite effects and sounds from this library saves a ton of time once you start editing regularly.
How to Start Editing in CapCut? (Basic Setup)
Importing Videos, Images, and Audio Files
Open CapCut and tap the large “+” button on the home screen. This takes you to your phone’s media library. Select the clips you want to work with you can select multiple clips at once. They will be arranged in the order you select them, so pick them in the sequence you want.
Tap “Add” in the bottom right corner. Your clips will now appear on the editing timeline, ready to work with.
One important thing: CapCut imports clips in the sequence you tap them. If you want Clip B before Clip A, tap B first. You can always reorder later by pressing and holding a clip on the timeline, but it saves time to get the order right from the start.
Choosing the Correct Aspect Ratio (9:16, 16:9, 1:1)
This is one of the most critical decisions you make before editing begins. Getting this wrong means your video gets cropped or appears with black bars when uploaded.
Here is the breakdown:
| Platform | Recommended Ratio |
| TikTok | 9:16 (Vertical) |
| Instagram Reels | 9:16 (Vertical) |
| YouTube Shorts | 9:16 (Vertical) |
| YouTube Standard | 16:9 (Horizontal) |
| Instagram Square Post | 1:1 |
To set the ratio in CapCut, tap on the “Ratio” option in the toolbar (it appears when no clip is selected). Select your target ratio. CapCut will show you a canvas frame you can then pinch and drag each clip to fit within it properly.
Setting Up Your Project for TikTok, Reels, or YouTube
After setting the aspect ratio, I always do these three things before I start the actual edit:
- Rename the project: tap the pencil icon next to the project name. This saves confusion when you have multiple drafts.
- Set the frame rate: for most social media content, 30fps is perfect. For cinematic YouTube content, 24fps gives a film-like feel. For gaming or action content, 60fps is smoother.
- Preview your raw clips once: watch through all your imported footage before editing. This gives you a mental map of what you have and where the good moments are.
Step-by-Step Guide to Edit TikTok Reels Using CapCut
This is the section most people come here for the actual editing workflow for TikTok and Instagram Reels. I have done hundreds of these, and this is the exact process I follow.
Step 1 – Import and Arrange Clips Properly
After importing your footage (as described above), arrange the clips in the timeline by pressing and holding a clip and dragging it to its correct position. For TikToks and Reels, think about your narrative structure:
- Hook clip (0–3 seconds) what grabs attention immediately
- Core content clips (3–60 seconds) your main message or story
- Closing clip a call to action, reaction, or satisfying ending
Get this order right before you start any cutting or effects work. Rearranging after adding effects creates a mess.
Step 2 – Trim, Cut, and Split Video Clips
Now comes the most time-consuming but most important step: cutting your clips to remove everything that does not need to be there.
To trim (remove from the beginning or end of a clip): Tap the clip in the timeline. Drag the left or right edge inward. The red handles control the start and end points.
To split (cut a clip into two pieces at a specific point): Move the playhead (the white vertical line) to exactly where you want to cut. Tap the clip, then tap “Split” in the toolbar. You now have two separate clips you can edit independently.
To delete a portion: Split at the beginning and end of the section you want to remove, tap the middle piece, and tap “Delete.”
For TikTok editing specifically, aim to cut all pauses longer than one second. Every “um,” every awkward pause, every moment where nothing is happening cut it. This is what separates amateur edits from professional ones.
Step 3 – Add Music, Voiceover, and Sound Effects
Audio makes or breaks a TikTok. A great video with bad audio will underperform every time.
To add background music:
- Make sure no clip is selected, then tap “Audio” in the toolbar
- Tap “Sounds” to browse CapCut’s music library
- Search for a genre, mood, or specific song name
- Tap the + button to add it to your timeline
To add your own voiceover:
- Go to Audio → Record
- Position the playhead where you want to start recording
- Hold the record button and speak CapCut records in real time
To extract audio from a video (useful if you have a trending sound saved as a video):
- Go to Audio → Extract
- Select the video from your gallery CapCut pulls out just the audio track
Beat syncing tip: After adding music, use the “Beat” feature under Audio settings. CapCut automatically detects the beats in the song and places yellow markers on the timeline. Try to align your cuts to these markers it makes the edit feel energetic and satisfying to watch.
Step 4 – Add Text, Captions, and Subtitles
Text on screen is no longer optional for TikTok and Reels studies consistently show that captions and on-screen text dramatically improve watch time, especially on mobile where many people watch without sound.
To add text manually:
- Tap “Text” in the toolbar
- Type your text in the input field
- Choose a font, color, and animation style
- Position it on screen and adjust the duration on the timeline
To add automatic captions (my personal favorite CapCut feature):
- Tap “Text” → “Auto Captions”
- Select the language (CapCut supports Hindi, Urdu, English, and many more)
- Tap “Generate” CapCut transcribes your speech and places captions automatically
The auto-captions are not perfect, but they are about 90% accurate and save enormous amounts of time. Always review and correct them after generation.
Text styles that perform well on TikTok: Bold fonts with a slight shadow, animated “pop-in” entrance effects, and contrasting colors (white text with dark outline, or yellow text on darker backgrounds).
Step 5 – Apply Transitions and Smooth Effects
Transitions are how you move from one clip to the next. CapCut offers hundreds from simple fades to dramatic glitch effects.
To add a transition:
- In the timeline, look for the small white square between two clips
- Tap it this opens the transitions panel
- Browse categories: Basic, Blur, Glitch, 3D, etc.
- Tap any transition to preview it. Tap “Apply to All” to use it everywhere, or leave it as a single-clip transition
My honest advice on transitions: Less is more. Beginners tend to go overboard with flashy transitions between every single clip. What actually works on TikTok is consistency pick one or two transition styles and use them throughout the video. The most effective transitions are often the simplest: a quick cut on beat, or a smooth cross-dissolve.
Step 6 – Add Filters, Color Grading, and Visual Enhancements
Filters and color grading give your video a consistent visual mood. If every clip was filmed in different lighting, this step is how you unify them.
Filters: Tap “Filters” in the toolbar. CapCut organizes them by mood Cinematic, Portrait, Vlog, Natural, etc. For most TikTok content, the “Natural” and “Portrait” categories work well. Apply the filter to all clips by selecting “Apply to All” after choosing one.
Color adjustments (for more control): Tap a clip, then tap “Adjust.” Here you can manually control brightness, contrast, saturation, sharpness, and more. This is where real color grading happens.
HSL tool: Hidden inside Adjust is the HSL panel it lets you adjust specific colors individually. Want to make the sky more blue, or your skin tone warmer? This is the tool for that.
Step 7 – Preview and Final Adjustments
Before exporting, do a full preview of the entire video from beginning to end. During this preview, watch for:
- Any jump cuts that feel jarring or off-beat
- Text that appears too quickly or disappears too fast
- Audio that is too loud or too quiet relative to other sections
- Any unwanted visual glitch or artifact from effects
Fix everything you notice. Then preview one more time. Only when you would be comfortable posting it publicly should you move to export.
How to Edit YouTube Videos Using CapCut? (Long-Form Editing Workflow)
Editing a 10-minute YouTube video in CapCut is a different experience from editing a 30-second Reel. It requires more patience and a different mindset but the tools are all there.
Structuring Long Videos for Retention
Before cutting a single frame, watch your raw footage and write a loose structure: intro, main sections, and outro. Think of it as an invisible chapter system. Viewers who can follow a clear structure stay longer.
In CapCut, you can use text cards between sections as visual chapter breaks a simple text overlay on a clean background that says something like “Part 2: The Setup.” This is a small thing that makes long videos feel organized and professional.
Removing Silence, Mistakes, and Filler Words
For talking-head YouTube content, this is where you spend most of your editing time. Use the Split tool aggressively:
- Split before and after every “um,” “uh,” and “you know”
- Split around any long pause (more than 1.5 seconds of silence)
- Split around any take you need to replace or remove
After splitting, tap the unwanted segment and delete it. The clips on either side will snap together. You may get a tiny jump cut smooth these out later with a very short 0.2-second “Basic Fade” transition.
Adding Intro, Outro, and Branding Elements
A YouTube video without branding is a missed opportunity. In CapCut, I create a simple intro by:
- Adding a short 3-5 second video clip of the channel logo or a title card
- Placing it at the very beginning of the timeline
- Adding an animated text overlay with the channel name and video topic
For the outro, I do the same at the end a short card encouraging viewers to subscribe, with text and a simple fade-out effect.
You can also add watermarks by going to Text → add your channel name or handle → adjusting the opacity down to about 40% → dragging it to the corner. Lock it in place and it will appear on every frame of your video.
Audio Balancing for Professional Sound Quality
Nothing kills a YouTube video faster than inconsistent audio one section too quiet, another suddenly loud and jarring.
In CapCut, tap your main audio track, then use the “Volume” slider. For voiceover content, keep the voice at 100% and background music between 15–30%. For music-only content (montages, travel videos), set music at 80–90%.
Use the Fade In / Fade Out feature at the beginning and end of each audio clip. A 0.5-second fade prevents audio from cutting in or out abruptly.
If your original recording has background noise, try CapCut’s Noise Reduction feature under Audio → Noise Reduction. It is not perfect, but it significantly cleans up recordings made in noisy environments.
How to Create Viral Reels with CapCut? (Pro Creator Tips)
These are the techniques that separate creators who struggle to get views from those who consistently hit tens of thousands of plays.
Hook Editing for the First 3 Seconds
The algorithm on TikTok, Instagram Reels, and YouTube Shorts judges your video within the first 3 seconds. If viewers swipe away early, the algorithm stops pushing the video. If they stay, it rewards you.
The most effective hooks I have used:
- Start mid-action – do not start with a blank intro. Start in the middle of the most interesting moment, then pull back and explain context.
- On-screen text hook – a bold question or statement that appears immediately. “I almost quit editing because of this mistake.” The viewer stays to find out what the mistake was.
- Pattern interrupt – something visually unexpected in the first frame. A close-up, an unusual angle, a sudden color change.
In CapCut, place your hook clip first in the timeline and treat those 3 seconds as sacred. Do not waste them.
Beat Sync Editing for Engagement
I touched on beat sync earlier, but it deserves its own section because it is genuinely one of the most powerful techniques for increasing engagement.
Beat-synced edits feel satisfying on a subconscious level the viewer gets a small dopamine hit every time a cut lands on a beat. CapCut’s automatic beat detection makes this achievable for beginners.
After enabling beat markers, try to place every major cut where one clip ends and the next begins directly on a yellow marker. It takes a few extra minutes but the difference in how the final video feels is significant.
Using Trending Sounds Effectively
Trending sounds are a major distribution mechanism on TikTok and Reels. When a sound is trending, the algorithm actively suggests your video to people who have watched or engaged with that sound before.
In CapCut’s sounds library, filter by “Trending” to see what is currently popular. Add the trending sound to your video, but use it at a reasonable volume do not let it overwhelm your original audio if you are speaking or narrating.
Important: If you plan to monetize your YouTube channel, avoid copyrighted music in long-form content. Use royalty-free tracks for YouTube. Trending sounds on TikTok are generally safe for TikTok use specifically, but not for cross-posting to YouTube.
Caption Styles That Improve Watch Time
After months of testing different caption styles, the ones that consistently perform best:
- Highlighted word captions – each word highlights in a different color as it is spoken. CapCut’s “Karaoke” text template does this automatically.
- Large, centered bold text – placed in the middle or lower third of the screen.
- Emoji punctuation – a single relevant emoji at the end of key caption lines draws the eye and adds personality.
Avoid using tiny text, low-contrast colors (light gray on white background), or fonts that are difficult to read quickly. Remember, viewers are scrolling fast.
Export Settings for TikTok, Reels, and YouTube Videos
Getting the export settings right is the last step and it matters more than most creators realize.
Best Resolution and FPS Settings (1080p / 4K / 30–60fps)
Tap the settings icon (⚙) in the top right corner before exporting. Here is what I recommend:
| Platform | Resolution | Frame Rate |
| TikTok | 1080p | 30fps |
| Instagram Reels | 1080p | 30fps |
| YouTube Shorts | 1080p | 30fps |
| YouTube Standard | 1080p or 4K | 30fps or 60fps |
| Gaming / Action Content | 1080p | 60fps |
4K is available in CapCut but produces very large file sizes. Unless your original footage was shot in 4K, exporting at 1080p is the right call upscaling from 1080p to 4K does not improve quality.
File Format Optimization
CapCut exports in MP4 format by default this is ideal for all major platforms. The codec used is H.264, which offers the best balance between file size and quality for social media uploads.
CapCut also offers H.265 (HEVC) exports, which produce smaller files at similar quality. However, not all platforms handle H.265 equally for TikTok and Instagram specifically, stay with H.264 (the default) to avoid any playback issues.
Compression Without Quality Loss
The bitrate setting controls how much data is packed into each second of video. Higher bitrate = better quality but larger file size.
For most social media content, the default CapCut bitrate is fine. If you want slightly better quality, tap “Recommend” next to the resolution slider CapCut will select the optimal bitrate for your chosen resolution automatically.
After exporting, check the file on your phone before uploading. If you notice visible compression artifacts (blurry areas, blocky edges), increase the bitrate and re-export. If the file size is too large for a platform’s upload limit, reduce the bitrate by one step.
Common Mistakes While Using CapCut (Avoid These)
I made all of these mistakes when I was starting out. Hopefully this list saves you some time.
Overusing effects and transitions: Adding a different flashy transition between every clip is a telltale sign of a beginner edit. Use effects purposefully, not just because they look cool. If an effect does not serve the story or energy of the video, remove it.
Poor audio syncing: Having music that cuts off abruptly, or a voiceover that does not match the lip movements on screen, immediately breaks viewer immersion. Always check audio sync after any speed adjustments or clip rearrangements.
Wrong aspect ratio selection: Editing a TikTok in 16:9 means it will have massive black bars on the sides when uploaded. This does not just look bad the platform’s algorithm sometimes penalizes videos that are not optimized for its native format. Always set the ratio before editing, not after.
Low-quality exports: Exporting at 480p or 720p in 2026 is a real problem. Social media platforms compress your video upon upload if you start with low resolution, the final result looks genuinely bad. Always export at a minimum of 1080p.
CapCut Editing Tips for Beginners and Advanced Users
Use layers for professional editing. Never put everything on one single track. Use separate layers for audio, text, effects, and overlays. This gives you control you can edit one element without accidentally affecting another.
Keep transitions minimal but smooth. The best edits often feel invisible. The viewer should be absorbed in the content, not distracted by your transitions. Use simple fades and clean cuts 80% of the time, and save dramatic transitions for moments that earn them.
Maintain visual storytelling flow. Think about color and energy levels as you edit. If two consecutive clips have very different color temperatures (one warm, one very cool), it creates a jarring visual jump even if the cut itself is clean. Use color grading to bring clips to a consistent look.
Use CapCut’s AI tools smartly. Auto Captions, Background Removal, AI Enhance (sharpening blurry footage), and Auto-Reframe (automatically repositions clips for different aspect ratios) are genuinely time-saving features. But use them as starting points, not final results always check and adjust the AI output manually.
CapCut vs Other Video Editors (Quick Comparison Insight)
CapCut vs InShot
InShot was the dominant mobile editor before CapCut. It is still a solid tool, but it lacks multi-layer timeline editing, AI-powered features, and the depth of CapCut’s effects library. For simple trims and basic text, InShot is fine. For anything more complex, CapCut is the better choice.
CapCut vs VN Editor
VN Editor is popular for its clean interface and good audio tools. It handles multi-layer editing reasonably well. However, CapCut’s AI features, larger template library, and TikTok integration make it the stronger choice for social media creators specifically.
CapCut vs Premiere Rush
Adobe Premiere Rush is a solid professional option, especially for creators already in the Adobe ecosystem. Its color tools and audio mixer are more advanced than CapCut. However, it requires an Adobe subscription, has a steeper learning curve, and lacks the social-media-specific features that CapCut offers. For YouTube content at a serious level, Premiere Rush or DaVinci Resolve desktop is worth exploring. For TikTok and Reels, CapCut wins.
FAQ’s
Is CapCut Free for TikTok and YouTube Editing?
Yes, CapCut is completely free to download and use for both TikTok and YouTube editing. The free version includes all core editing tools, the effects library, auto captions, and export up to 4K without a watermark. CapCut does offer a paid subscription (CapCut Pro) that unlocks additional premium templates, AI features, and cloud storage but the free version is genuinely capable for most creators.
Can I Use CapCut for Professional Video Editing?
For social media content absolutely yes. Many full-time content creators with millions of followers use CapCut as their primary editing tool. For broadcast-level production work (television, films, commercial advertisements), you would typically move to professional desktop software. But for YouTube, TikTok, Instagram Reels, and brand content CapCut is more than capable.
What Is the Best Export Setting in CapCut?
For most creators: 1080p resolution, 30fps frame rate, H.264 codec, and CapCut’s default (recommended) bitrate. This gives excellent quality at a manageable file size on every major platform.
Does CapCut Reduce Video Quality?
CapCut itself does not reduce your video quality but every export involves compression, which is unavoidable. The key is to start with good source footage and export at the highest settings your device can handle. Then let the social media platform compress the video on their end which they do regardless of which editor you use.
Conclusion
If there is one thing I want you to take away from this guide, it is this: CapCut removes the technical barrier between you and great video content. The tools are there. The AI assists. The interface, once you understand the three zones preview, timeline, and toolbar becomes genuinely intuitive.
Start with the basics: import your clips, set the right aspect ratio, cut aggressively, add captions, and choose audio that matches your energy. Those five things alone will put your videos ahead of 80% of what is being posted.
Then, as you get more comfortable, layer in the advanced techniques: beat sync editing, color grading, strategic hook design, and pro export settings. Each skill compounds on the last.
CapCut is, in my experience, the best free video editing app available right now for creators focused on TikTok, Instagram Reels, and YouTube. And in 2026, with the AI features maturing rapidly, it is only getting more powerful.